Get started
Installation & requirements
Classify is a standard Laravel application — anything that runs Laravel 13 runs Classify. This page covers what your server needs, the general install steps, and full walkthroughs for the two most common hosting shapes: shared cPanel hosting and a self-managed VPS.
On this page
System requirements
| Requirement | Minimum |
|---|---|
| PHP | 8.3 or newer (8.4 recommended) |
| PHP extensions | curl, json, zip, gd (or imagick), mbstring, openssl, pdo, pdo_mysql, tokenizer, xml, ctype, fileinfo, bcmath |
| Database | MySQL 8.0+ or MariaDB 10.5+ |
| Composer | 2.x |
| Node.js | 18+ (only needed to build the frontend — not required at runtime) |
| Web server | Apache with mod_rewrite, or Nginx |
| Cron | One cron entry, see below — required for expiring listings, digest emails, and saved-search alerts |
| Redis | Optional but recommended — see Running without Redis if your host doesn't offer it |
| Disk | Writable storage/, bootstrap/cache/, and public/uploads/ directories — see Post-install checklist |
Classify uses Stripe for payments and, optionally, Mailchimp for newsletters and web push for browser notifications. None of these are required to get the site running — leave the corresponding .env keys blank and those features simply stay inactive.
General installation
These are the same steps regardless of host — cPanel and VPS instructions below layer extra detail on top of this. If you downloaded this from CodeCanyon, dependencies and front-end assets are already built into the package — you only need to install them yourself when building from source.
- Upload the codebase Upload the full application to your server (via Git, an uploaded zip, or your host's file manager).
-
Install dependencies (source checkouts only — the CodeCanyon package ships
vendor/andpublic/build/already built)composer install --optimize-autoloader --no-dev npm install npm run buildnpm run buildcompiles both the client bundle and the server-side rendering (SSR) bundle. -
Set directory permissions
Uploaded images (ads, profile photos, category icons, page-builder media) are written directly intochmod -R 775 storage bootstrap/cache mkdir -p public/uploads && chmod -R 775 public/uploadspublic/uploads/…— that folder must be writable by the web server user, not juststorage/. -
Point your domain's document root at
/publicLaravel's front controller lives inpublic/index.php— the web server's document root must be that folder, not the project root. See the cPanel section below if your host won't let you change it. -
Visit your domain
With no
storage/app/installed.lockfile yet, every request redirects to/install— a guided wizard that checks requirements, verifies your purchase code, collects database credentials, and creates your admin account. See The guided setup wizard below for a full walkthrough. Make sure.envitself is writable first — the wizard writes your database and app config straight into it. -
Start the SSR server
The public storefront uses server-side rendering for fast first paint and SEO (php artisan inertia:start-ssrINERTIA_SSR_ENABLED=trueby default). This needs to be a long-running process — see the VPS section for running it under Supervisor. If you can't run a background process, setINERTIA_SSR_ENABLED=falsein.env— the site still works, just without SSR. - Set up the cron job One cron entry running every minute — see The cron job, explained.
The guided setup wizard
Once your files are uploaded and .env is writable, visiting your domain launches a six-step wizard — no manual .env editing, migrate, or db:seed commands required.
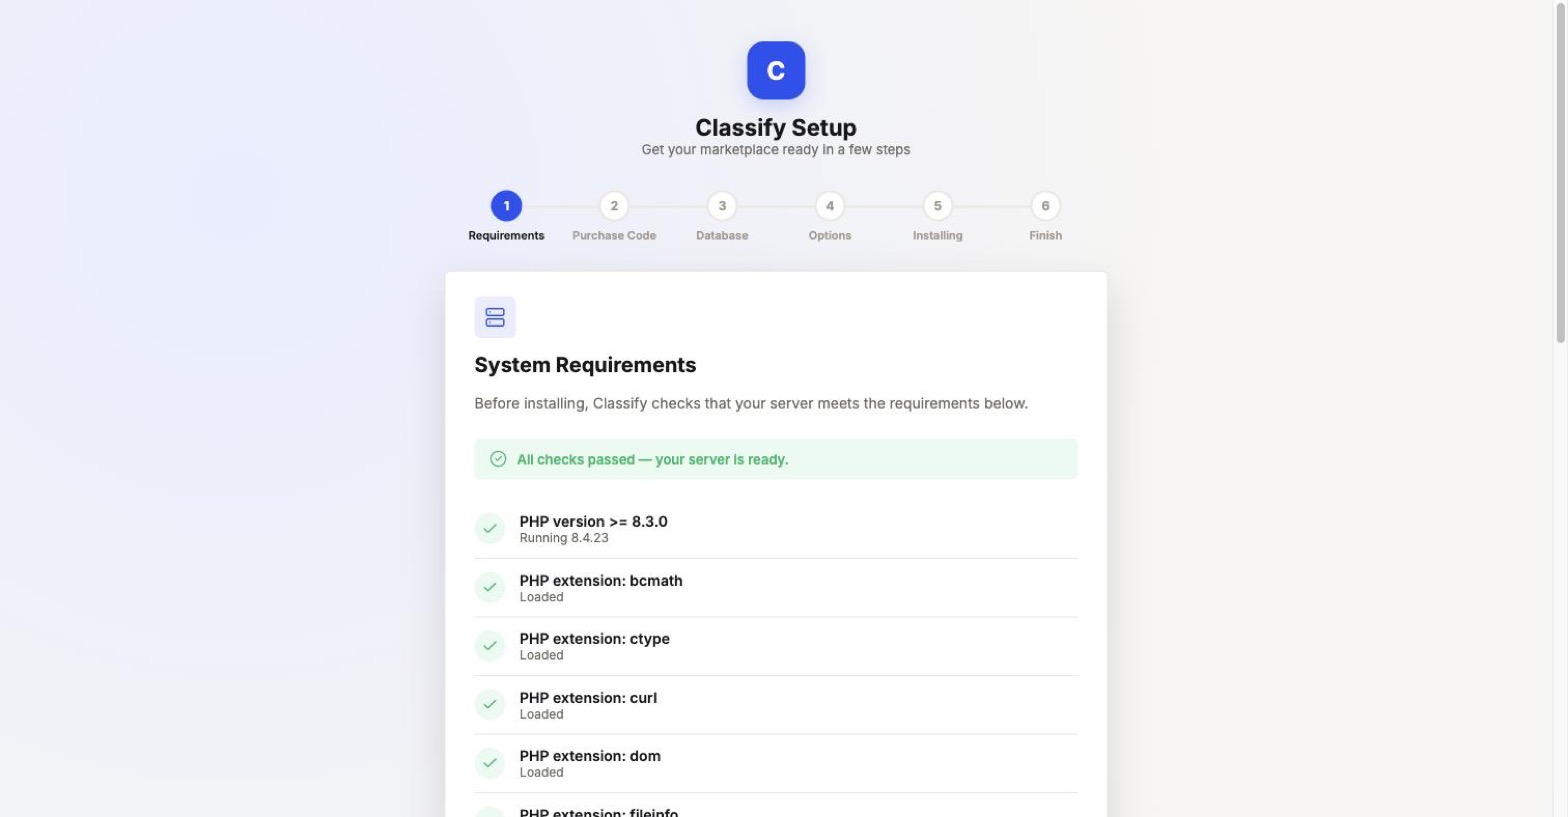
storage/, bootstrap/cache/, public/uploads/, and .env are all writable.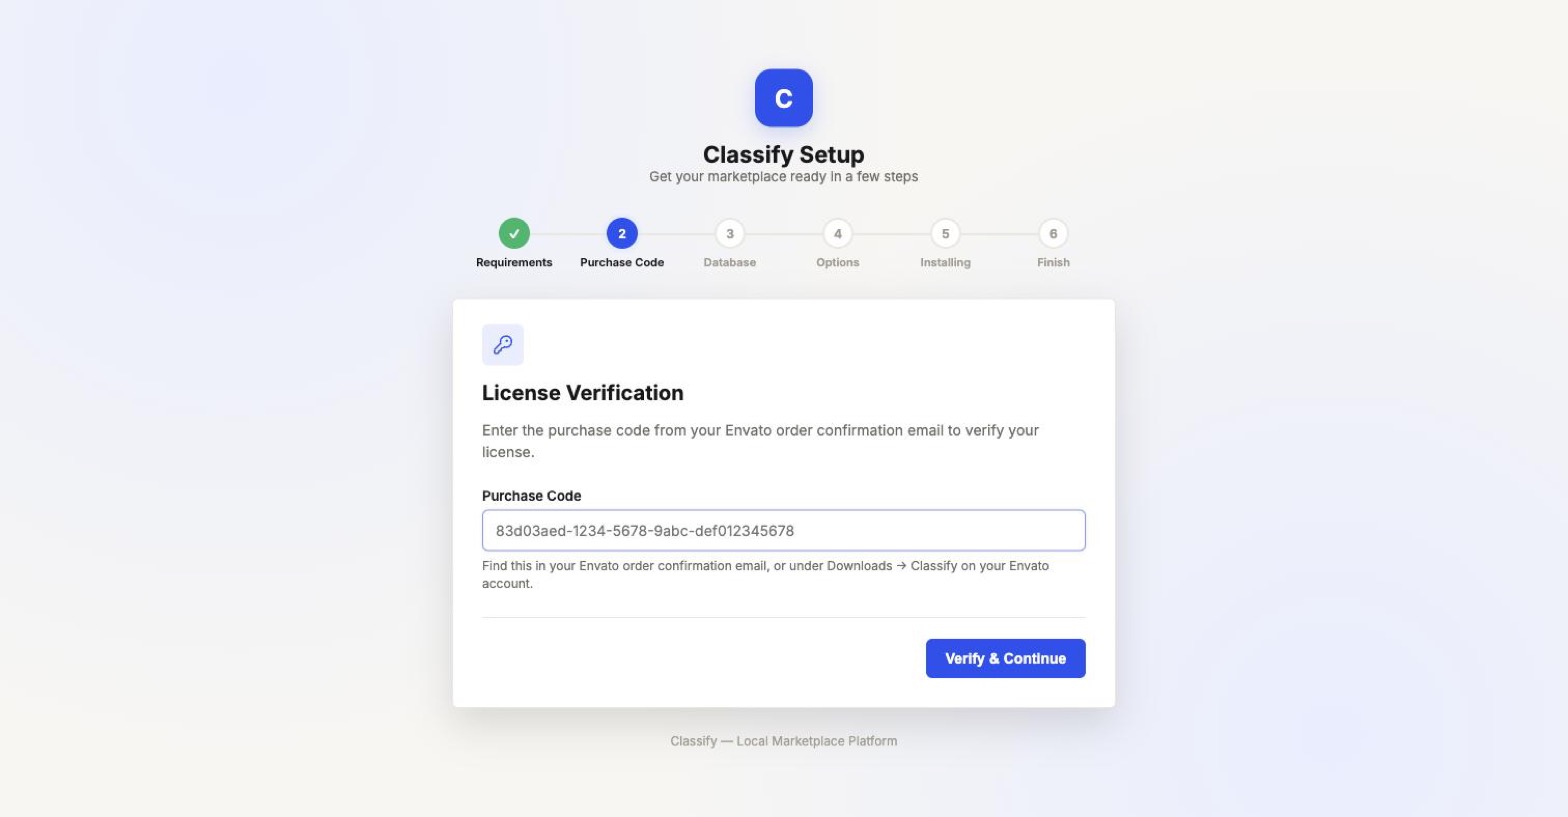
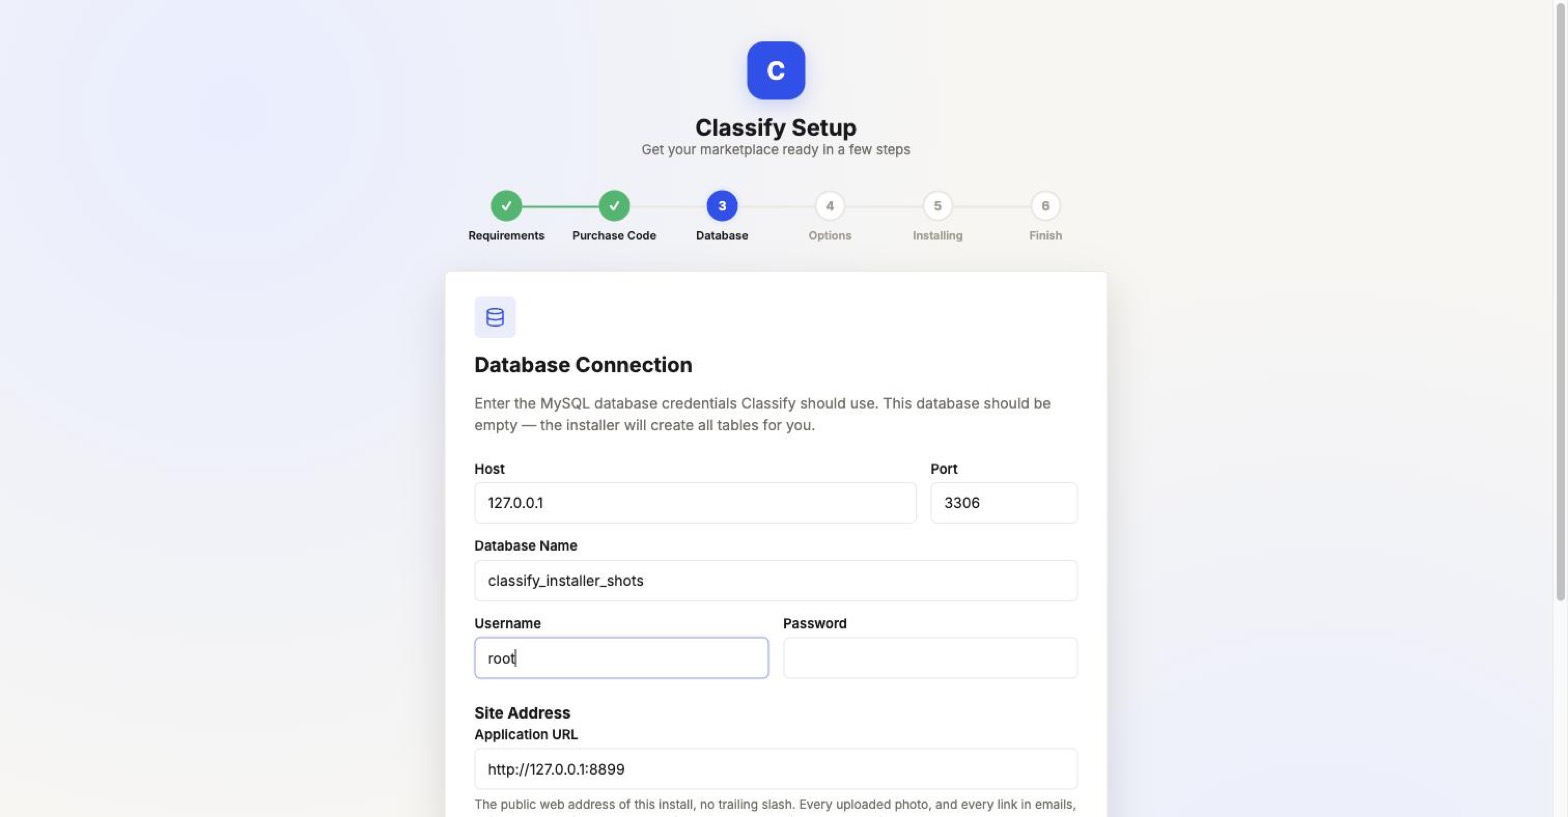
.env, and generates a fresh APP_KEY unique to your install.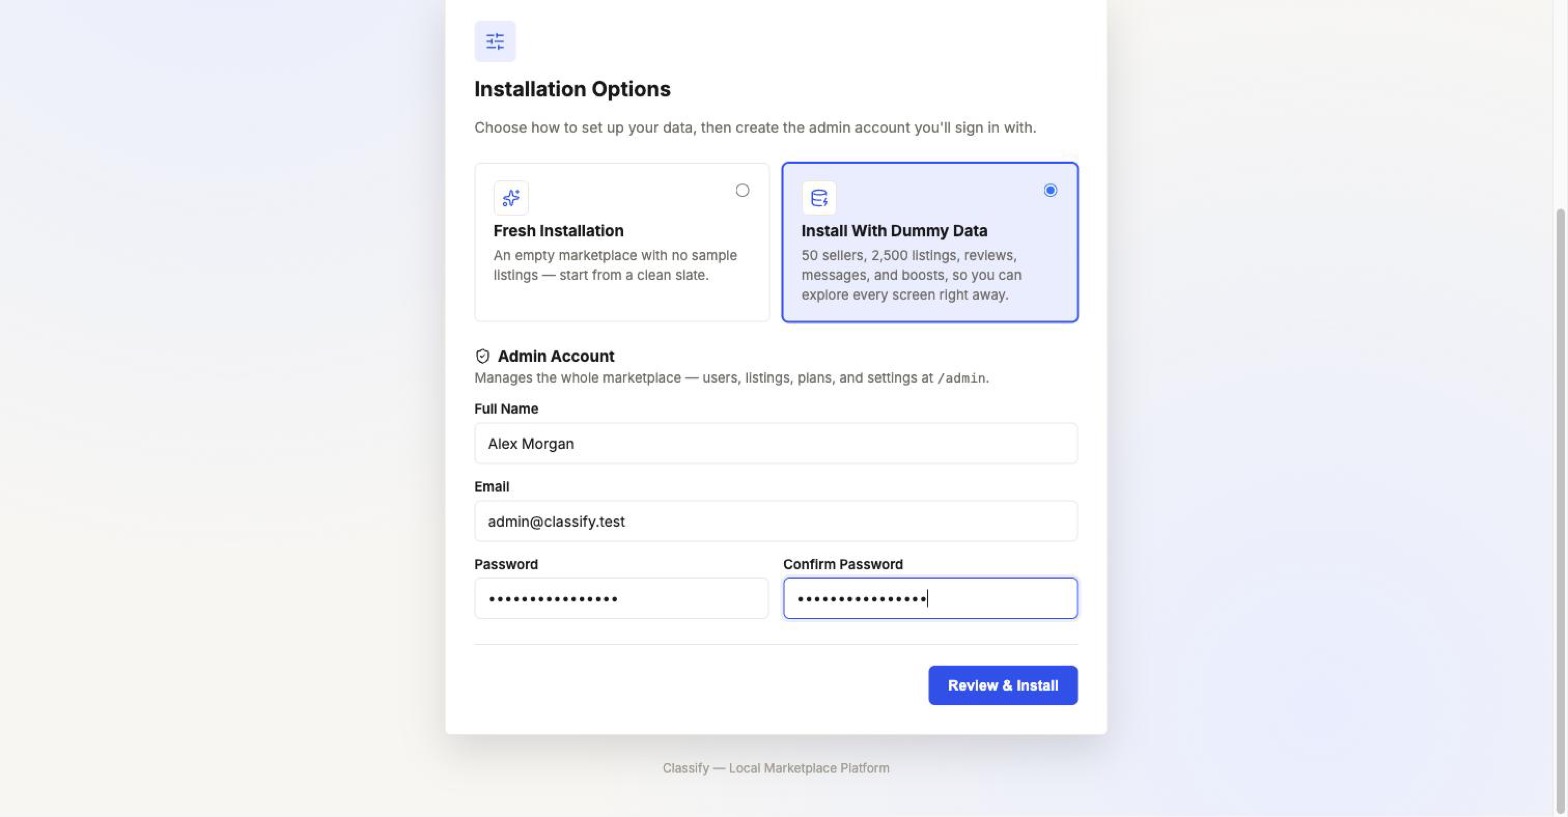
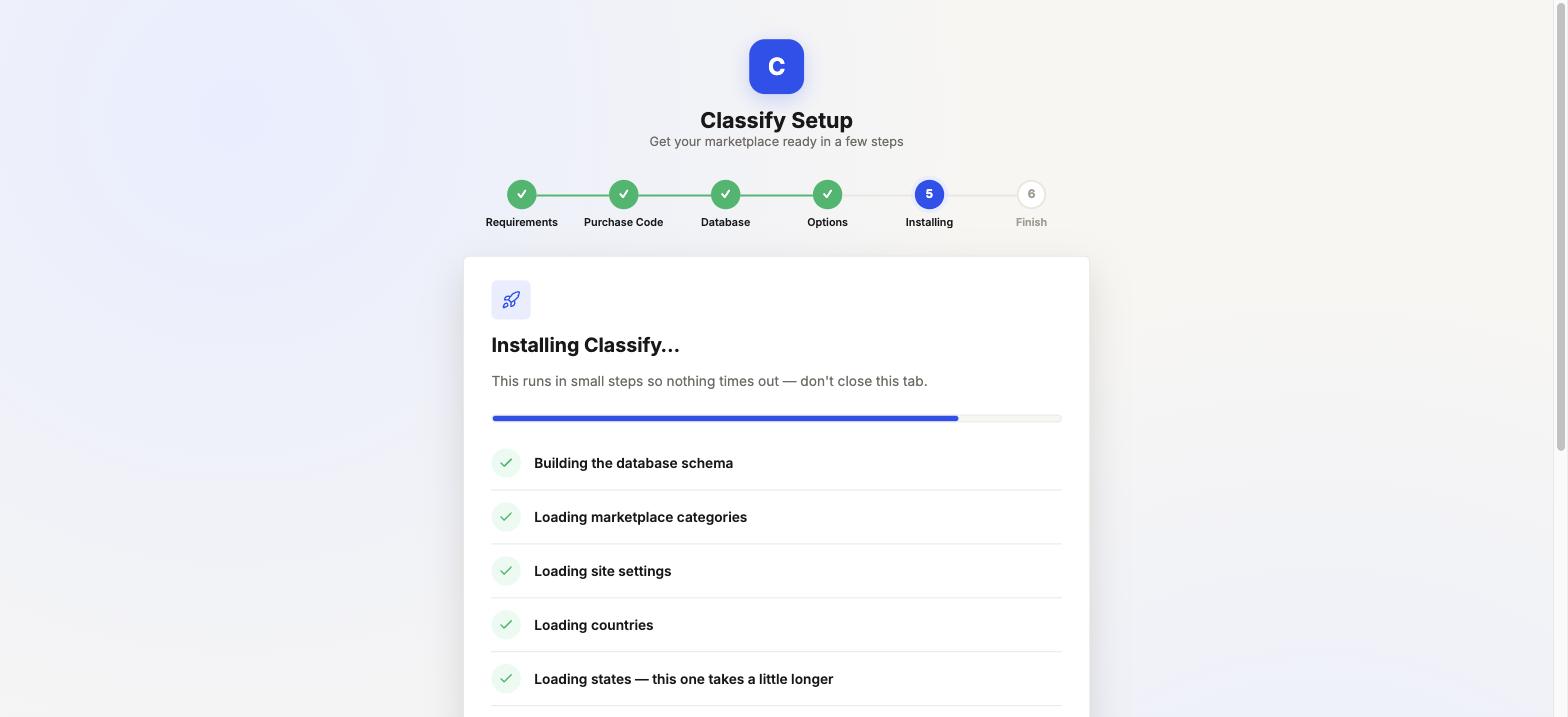
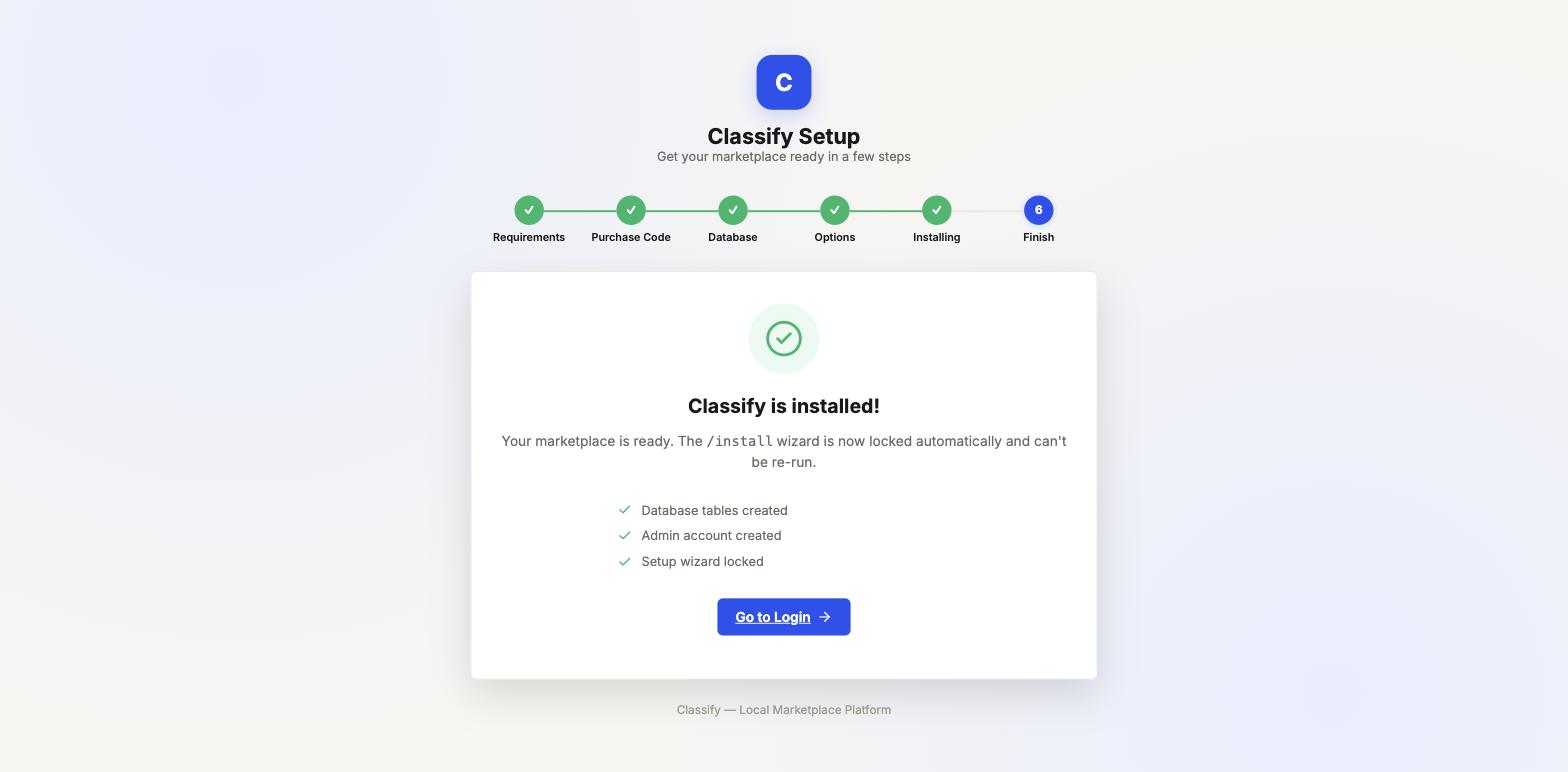
storage/app/installed.lock) so /install can't be re-run, and hands you off to login.Installing on cPanel
Shared hosting has two recurring constraints this section addresses directly: the document root usually can't be pointed at /public, and Redis usually isn't available.
1. Upload & extract
Upload the project as a zip via File Manager (or push via Git if your host offers Git Version Control) into a folder outside public_html if possible — e.g. /home/youruser/classify — then point the domain at it as described in step 3. If your host only lets you use public_html as the project root, that's fine too; the .htaccess trick below handles it either way.
2. Composer & Node
Most cPanel hosts provide "Setup Node.js App" and a PHP selector with Composer available via SSH or a "Terminal" app in cPanel. Run the same composer install / npm install & build commands as the general install. If your host has no SSH access, build the frontend (npm run build) on your local machine and upload the generated public/build/ folder along with everything else — the server never needs Node at runtime, only the compiled output.
3. Document root — the .htaccess trick
cPanel almost always maps your domain straight to public_html, with no option to serve from a subfolder like public_html/public. This project ships a root-level .htaccess file for exactly this case — it transparently rewrites every request into /public, whose own .htaccess then hands it to Laravel:
# For shared/cPanel hosting where the domain's document root is this
# project's root folder (not /public) and it cannot be changed — routes
# every request into /public, whose own .htaccess then hands it to
# Laravel's front controller. If your host lets you set the document root
# directly to /public instead, this file is not needed.
<IfModule mod_rewrite.c>
    RewriteEngine On
    RewriteBase /

    # Already inside /public — don't rewrite again (avoids a redirect loop).
    RewriteCond %{REQUEST_URI} !^/public/

    RewriteRule ^(.*)$ public/$1 [L,QSA]
</IfModule>
It's already in the project root — nothing to do here except confirm mod_rewrite is enabled (it is on virtually every cPanel host by default). If your specific host does let you change the document root to /public directly (some do, under "Domains" → "Document Root"), do that instead and you can delete this file — it's simpler and one request layer shorter.
4. cron job
cPanel → Cron Jobs → add a new job set to run every minute, with this command (adjust the path and PHP binary to match your account):
* * * * * /usr/local/bin/php /home/youruser/classify/artisan schedule:run >> /dev/null 2>&1Use the full path to both PHP and artisan — cron doesn't use your shell's PATH or working directory. If you're unsure of the PHP binary path, cPanel's cron UI usually has a dropdown to pick the PHP version, which fills this in for you.
5. Redis
Shared hosts essentially never offer Redis. Skip straight to Running without Redis below and set cache, queue, and session to the database driver — no extra software to install, it just uses tables in your existing MySQL database.
6. SSR on cPanel
A cPanel account usually can't run a persistent background Node/PHP process (no Supervisor, no systemd access). Two options:
- If your host's "Setup Node.js App" tool supports running an arbitrary long-lived app, point it at
php artisan inertia:start-ssr— some hosts support this. - Otherwise, set
INERTIA_SSR_ENABLED=falsein.env. The public site renders client-side only — everything still works, you lose the SSR speed/SEO boost, not functionality.
Installing on a VPS
On a VPS you control the whole stack, so this section covers the pieces cPanel can't: a real queue worker, Redis, and SSR, all kept alive by Supervisor.
1. Web server
Point Nginx (or Apache) directly at /path/to/classify/public as the document root — no .htaccess trick needed here, since you control the vhost config. A minimal Nginx server block:
server {
    listen 80;
    server_name example.com;
    root /var/www/classify/public;
    index index.php;

    location / {
        try_files $uri $uri/ /index.php?$query_string;
    }

    location ~ \.php$ {
        fastcgi_pass unix:/var/run/php/php8.4-fpm.sock;
        fastcgi_index index.php;
        include fastcgi_params;
        fastcgi_param SCRIPT_FILENAME $document_root$fastcgi_script_name;
    }

    location ~ /\.(?!well-known).* {
        deny all;
    }
}
2. Redis
sudo apt install redis-server
sudo systemctl enable --now redis-server
Leave .env's defaults as they ship — CACHE_DRIVER=redis, QUEUE_CONNECTION=redis, SESSION_DRIVER=redis — and set REDIS_HOST/REDIS_PORT if Redis isn't on localhost's default port.
3. Queue worker & SSR server, kept alive with Supervisor
Both the queue worker and the SSR server are long-running processes — if either dies, nothing restarts it on its own. Supervisor solves that. Install it, then add two program files:
sudo apt install supervisor/etc/supervisor/conf.d/classify-queue.conf
[program:classify-queue]
process_name=%(program_name)s_%(process_num)02d
command=php /var/www/classify/artisan queue:work redis --sleep=3 --tries=3 --max-time=3600
directory=/var/www/classify
autostart=true
autorestart=true
numprocs=2
user=www-data
stopwaitsecs=3600
stdout_logfile=/var/www/classify/storage/logs/queue-worker.log
/etc/supervisor/conf.d/classify-ssr.conf
[program:classify-ssr]
command=php /var/www/classify/artisan inertia:start-ssr
directory=/var/www/classify
autostart=true
autorestart=true
user=www-data
stdout_logfile=/var/www/classify/storage/logs/ssr.log
sudo supervisorctl reread
sudo supervisorctl update
sudo supervisorctl status--max-time=3600 on the queue worker makes it restart hourly, picking up new code after a deploy without a manual restart — Supervisor's autorestart brings it straight back up.
4. cron job
crontab -e -u www-data* * * * * cd /var/www/classify && php artisan schedule:run >> /dev/null 2>&15. Deploys
After pulling new code:
composer install --optimize-autoloader --no-dev
npm ci && npm run build
php artisan migrate --force
php artisan config:cache && php artisan route:cache && php artisan view:cache
sudo supervisorctl restart classify-queue:* classify-ssr
Running without Redis (database-backed cache & queue)
Classify ships configured for Redis (CACHE_DRIVER, QUEUE_CONNECTION, and SESSION_DRIVER all default to redis in .env.example), because it's the fastest option and what the reference VPS setup above uses. If your host doesn't offer Redis — true of nearly every shared cPanel plan — switch all three to the database driver instead. Nothing else about the app changes; every feature works identically, just reading and writing through MySQL tables rather than Redis.
1. Create the required tables
The jobs and failed_jobs tables are already part of Classify's migrations, so the queue works out of the box. The cache and sessions tables are not — generate them once:
php artisan cache:table
php artisan session:table
php artisan migrate --force
2. Update .env
CACHE_DRIVER=database
QUEUE_CONNECTION=database
SESSION_DRIVER=database
Remove or ignore the REDIS_* variables — they're simply unused once nothing points at the redis driver.
3. Process queued jobs
This is the step that's easy to miss. Notifications, transactional emails, saved-search alerts, and search-index updates are all dispatched as queued jobs — nothing processes them until something runs php artisan queue:work (or queue:listen). Skip this and those features silently do nothing: no bug, no error, just an ever-growing backlog of unprocessed jobs.
On shared hosting without a persistent process, run the queue from the same cron job instead — replace the schedule:run cron command with one that also drains the queue every minute:
* * * * * cd /home/youruser/classify && php artisan schedule:run >> /dev/null 2>&1
* * * * * cd /home/youruser/classify && php artisan queue:work database --stop-when-empty --max-time=50 >> /dev/null 2>&1
--stop-when-empty --max-time=50 keeps each run short so it never overlaps the next minute's cron tick.
If your host does support a persistent background process (a VPS, or a cPanel "Setup Node.js App"–style long-running app), run php artisan queue:listen --tries=1 continuously instead — it auto-reloads on code changes, no worker restart needed after a deploy.
The cron job, explained
Every scheduled task in Classify — expiring listings, downgrading finished premium ads, renewal reminders, saved-search alerts, boost sweeps, reputation recomputation — is defined once in routes/console.php using Laravel's scheduler, not as separate cron entries. That means your server only ever needs one cron line, running every minute:
* * * * * php /path/to/classify/artisan schedule:run >> /dev/null 2>&1Laravel itself decides which of the individual tasks are actually due each minute. You never add or remove cron lines when tasks change — that's all handled in code.
| Task | Runs |
|---|---|
| Expire finished ads | Daily |
| Downgrade expired premium ads to regular | Daily |
| Send plan renewal reminders | Daily |
| Send saved-search match alerts | Daily |
| Sweep expired boosts | Daily |
| Roll up listing view/click events | Daily at 01:00 |
| Recompute location indexation | Daily at 02:00 |
| Recompute seller reputation scores | Daily at 02:30 |
Post-install checklist
APP_KEYis set (php artisan key:generate) andAPP_DEBUG=falsein production.public/uploads/exists and is writable by the web server user — this is where every uploaded image lands, notstorage/app/public.- The cron entry is installed and firing (check
storage/logs/laravel.logafter a minute or two). - The queue is actually being processed — see Running without Redis if you're not running Redis.
- Stripe keys are set in Admin → Settings → Stripe if you want subscriptions, boosts, and wallet top-ups to work.
- SMTP is configured in Admin → Settings → Email delivery and a test email sends successfully.
- Log in with the seeded admin account and change its password immediately (Admin → My account).
- If SSR is enabled, confirm the SSR process is actually running — a public page still loads without it, just without the speed/SEO benefit, so this is easy to miss silently.
Updating Classify
composer install --optimize-autoloader --no-dev
npm ci && npm run build
php artisan migrate --force
php artisan config:cache
php artisan route:cache
php artisan view:cache
On a VPS, restart the queue worker and SSR server afterward (supervisorctl restart classify-queue:* classify-ssr) so they pick up the new code. On cPanel, both restart naturally on their next cron tick — nothing to do.